I'm here too

Monday, July 21, 2014

Healthy Kids (fun recipes)

My last post (Pizza?) motivated me to find some great kiddie recipes. Sometimes I know it can be hard for the mommies of the world to get their little monsters to eat all the foods they need for their healthy growing bodies. I have been searching around to find a list of recipes and/or sites with helpful ideas that our kids will love!
Watermelon slush

Find here
 I found this recipe on Pinterest, but it came from the Food Network. It is just plain fresh Watermelon, no sugar, nothing extra, and we love clean eats!!

DIRECTIONS: The night before your picnic, puree 6 cups chopped seedless watermelon in a blender until smooth, pour into a shallow airtight container and freeze. Bring the frozen watermelon on your picnic (it'll double as an extra ice pack) and let thaw slightly, then mash with a fork and spoon into cups.


Sweet potato steak fries

borrowed from


2 pounds sweet potatoes, cut into 1/4-inch-thick x 3/4-inch-wide strips $
1 tablespoon olive oil $
1 teaspoon dried oregano
3/4 teaspoon salt
Cooking spray
Preparation

1. Preheat oven to 450°.
2. Combine first 4 ingredients in a large bowl; toss well. Arrange potatoes in a single layer on a large baking sheet coated with cooking spray. Bake at 450° for 18 minutes or until lightly browned.
for your toddler: Cut the fries into bite-sized pieces, or let baby pick them up whole.

Note:


Meatloaf in a mug

borrowed from
***another fun version of my "Mini Meatloaf Muffins" post from July 1st.***


1 pound extra-lean (92% lean) ground beef $
1/2 cup quick-cooking oats
1 large egg $
1 (5 1/2-ounce) can vegetable juice (we used V-8) $
1/4 cup finely chopped green onions
1/4 cup finely chopped carrot $
1/2 teaspoon salt
1/4 teaspoon pepper
1/4 cup ketchup $
Preparation

1. Stir together first 8 ingredients in a big bowl. Divide mixture evenly into 4 portions. Shape each portion into a ball. Place each ball into an 8-ounce microwave-safe coffee mug.
2. Line the bottom of the microwave with a big sheet of wax paper in case juices from the meatloaves bubble out. Place mugs in a circle on top of wax paper. Cover mugs with another big sheet of wax paper. Microwave at MEDIUM-HIGH (70% power) 11 minutes. Cut into meatloaves with a knife and fork. If any are still pink inside, microwave them 30 seconds more and recheck for done-ness. Carefully remove each mug from the microwave using oven mitts.
3. Spread 1 tablespoon ketchup over each meatloaf; cover with wax paper, and let stand 2 minutes


Grilled peanut butter and banana sammich

borrowed from


Heat a skillet or griddle over medium heat, and coat with cooking spray. Spread 1 tablespoon of peanut butter onto one side of each slice of bread. Place banana slices onto the peanut buttered side of one slice, top with the other slice and press together firmly. Fry the sandwich until golden brown on each side, about 2 minutes per side. 


Chicken and melon stuffed shells


***This may be on the Mom wish list, but it seems like a great kid idea!***


Ingredients:

1/2 medium cantaloupe, halved and seeded
4 dried jumbo macaroni shells
3 ounces chopped cooked chicken breast
1/4 cup diced honeydew melon
2 tablespoons plain fat-free yogurt
1 tablespoon lemon juice
1 1/2 teaspoons chopped fresh chives
1/2 teaspoon Dijon-style mustard
  Fresh thyme sprigs (optional)

Directions:

Cut the cantaloupe half into thirds; cover and chill two of the wedges. Peel and dice remaining wedge; set aside. Cook macaroni shells according to package directions. Drain and rinse with cold water. Drain again; set aside.

In a small bowl, combine diced cantaloupe, chicken, honeydew, yogurt, lemon juice, chives, and mustard. Spoon about 1/4 cup of the mixture into each pasta shell. Arrange two filled shells and a chilled cantaloupe wedge on each of two serving dishes. If desired, garnish with thyme sprigs.

Nutrition Facts: (Chicken-and-Melon-Stuffed Shells)
Per serving: 176 kcal cal., 2 g fat 26 mg chol., 55 mg sodium, 28 g carb., 2 g fiber, 14 g pro.
Percent Daily Values are based on a 2,000 calorie diet


I feel it is so important for us to try and feed our babies the best foods possible...even if you can't go organic, at least you can try for no added sugars, preservatives, or chemicals. Enjoy!


*Subscribe to this blog for more great health related 
discussions, and yummy recipes that will go straight to your inbox!


"Pizza?"


This was something I ate often when I was little and it's a kid friendly, healthy version of pizza. It's full of flavor, super quick and ready in the amount of time it takes to melt cheese in your oven. With very few ingredients you can have fun with the kids and teach them how to love good food.

Prep time: 5 minutes

Cook time: 7-10 minutes

Ingredients:

1 slice of bread (I used shepherd style sourdough)
sliced tomatoes
2 slices of Swiss cheese
sprinkle of cheddar or any fine grated cheese
Mustard
sliced (thin) onions
Basil
Pepper

Directions:

Spread mustard on your bread and layer first your Swiss cheese, tomatoes, onion, cheddar(fine grated), and pepper. Preheat your oven to 350 degrees, and on a foil lined cookie sheet place your "pizza" in for 7- 10 minutes, or until the cheese melts. Add the basil at the end for a bright, and fresh flavor!

**The best part about this great snack even more than it being a healthy alternative is that you can make it for less than $2.00.....wow!


*Subscribe to this blog for more great health related 
discussions, and yummy recipes that will go straight to your inbox!

Tuesday, July 1, 2014

Mini Meatloaf Muffins

I used a simple meatloaf recipe and packed it into mini muffin cups. I spiced the meat up with sauteed onions, garlic, mushrooms and fresh parsley so I could add less salt, and also used a GLUTEN-FREE "bread" crumb to bind it. Then I piped a dollop of mashed potatoes on top of each mini muffin and added a sprinkle of parsley. Tyler poured a little BBQ sauce on each one of his, and we paired it with a little avocado, tomato and cucumber salad.


Prep. time: 15 minutes

Cook time: 35 minutes

Servings: 4-6


Ingredients:
1 lb. of ground turkey
2 eggs
2/3 cup of gluten free panko or GF bread crumb
2 Tbs. olive oil
1 8 oz. pkg. of mushrooms chopped
1/3 cup onions chopped
1 Tbs. garlic minced
2 Tbs. chopped fresh parsley
1 tsp. dried parsley
3 cups of mashed potatoes
cooking spray
salt
lemon pepper

Preheat your oven to 350 degrees. Peel, dice and boil your potatoes. Saute onions, garlic, and mushrooms, in olive oil. Set that aside to let it cool down and grab a large mixing bowl. Combine the meat, eggs, about a 1/2 tsp(approx.) of lemon pepper, and when the onion mushroom mixture is cooled add that the parsley and bread crumbs. Mix by hand lighting incorporating all the ingredients, but be careful not to over mix or the meat will become tough when it's cooked.

Spray your muffin tin and roll approx. a Tbs. worth of the meat mixture and plop one into each mini muffin spot. You can lightly pressed down to create the "muffin shape." Once your oven is done preheating place the muffin tin in, uncovered, and set the timer for 20 minutes.

Drain your potatoes and whip them until they're creamy. Add a little salt and pepper. I used a sandwich bag to pipe the potatoes onto the finished mini muffins. Fill a sandwich bag to the tip of one side and cut the tip off, about the size of a dime. Set the potatoes to the side until the meat loaf muffins are finished.

When the muffins are done they should slide out pretty easy, arrange them on a tray or large plate, take your mashed potatoes and slowly in a circular motion pipe them into a little mound on top. I garnished each one with a sprinkle of dried parsley, but you could also spoon a glaze of BBQ sauce like my boyfriend did!

These are a fun little idea to mix up dinner night, for a party, or BBQ.


Wednesday, June 18, 2014

You might be dehydrated if...


One healthy habit to have is always to drink plenty of water especially during a meal
borrowed image
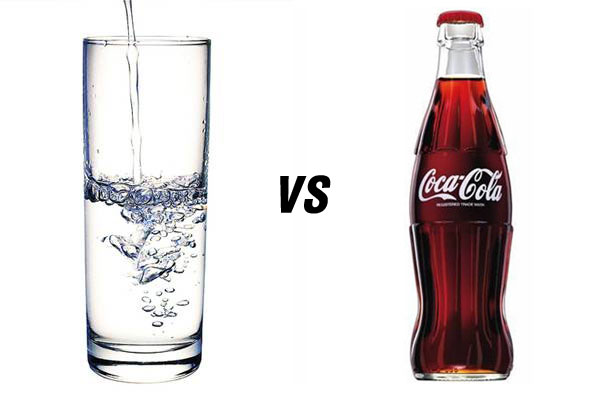
The other day my boyfriend, Ty, who is constantly having neck and upper back pain was complaining again. He knows why, and he won't remedy his situation with a simple solution. I have been telling him for a long time that he doesn't drink enough water, and his muscle pain is largely due to dehydration. People don't want to actually admit how much water they DON'T drink. It's crazy that drinking more water than you lie about could quite possible fix some of your physical ailments ranging from fatigue, muscle pain, stomach aches, constipation, even wight gain!

Image
borrowed image

I had read one of those viral Facebook posts comparing Coke to water. I was reminded of this when he started with his stiff neck lament yesterday, and it sounds like I don't care, but I do..very much. I'm worried that the second most important person in my life is not drinking enough water for no good reason and feeling pain because of it.


borrowed image

There is a really cool page I stumbled upon today when researching for this post and you can find it HERE. It has a great diagram and pictures for people with too little attention span for intense reading:) I enjoyed it very much, it has a lot of information about what exactly in your body is affected, and what parts of your body are mostly made of water i.e. your brain, blood, bones, and muscles.

Most of the time we think we're hungry when in fact we just need water. I'm not referring to replacing meals with water I'm saying that you are not hungry you are thirsty. I personally know people who hate drinking water and convince themselves that sweet no calorie drinks, juice or even soda suffice as hydration, but they don't..not at all. They are essentially sugar and in the case of no calorie beverages they are chemicals. Some times we need to realize that taking better care of ourselves is more important that what our taste buds prefer. Medication doesn't taste good even when they call it "grape" flavored, and if you are experiencing physical pain, upset digestion, fatigue or loss of energy sometimes the solution is clear, cold, refreshing, and sitting in your fridge!

Thursday, June 12, 2014

Master Cleanse

Here is a little info on the Master Cleanse I spoke of in the "Ayurveda Lemonade" post from yesterday.

"The Master Cleanse is a Juice Fast. It’s a liquid diet that provides a healthy amount of calories and nutrients specifically suited for weight loss and cleansing, all while resting the digestive system and allowing the body to heal naturally.."  (source)

This fast has been widely practiced and researched since the early 1940's. A lot of people use it to lose weight and that is where you will go wrong. The Master Cleanse is a detoxifying cleanse. Its purpose is to remove the impurities and toxins laying deep within your system. You will definitely lose weight, but it's purpose is to restore the system to a normal healthy state. If you go right back to eating bad food and not hydrating yourself properly you will gain all the weight back...almost immediately.

Remember this is a body cleanse, misusing it as a way to lose weight is not a great idea, starving yourself for the sake of weight loss is NEVER recommended. 

Here are the basic steps to completing the Master Cleanse.


"The Master Cleanse is such a simple program.

First, squeeze Fresh Lemon Juice.
Then add Rich Maple Syrup, and Cayenne Pepper into Pure Water.
Drink a minimum of six to 12 glasses throughout the day whenever one is hungry (For the Lemonade diet recipe with exact measurements, scroll down this page)
Take a laxative before bed.
instead of the morning laxative, you can do the Salt Water Flush." (source)

The laxative portion of the steps is truly optional, but it will more efficiently remove the bad stuff from your body a lot faster.

Check out these links for other sources of information about the Cleanse.

WebMd

Health US News

This is a great read by a lady named OanaWriter who, while making clear she is not an expert, documented her personal experience with the Master Cleanse.

There is always going to be a very skeptical opinion on depriving your body of actual food to "become healthier," and I definitely agree with starving yourself as being a very bad idea, but I have found that once every couple years this has helped me with DETOXIFYING my own body. I am not advocating that anyone reading this should go out and just start an endeavor like this, I'm simply sharing information on an option that deserves research if you are interested.


 *Subscribe to this blog for more great health related 
discussions, and yummy recipes that will go straight to your inbox!

Ayurveda Lemonade Raw Recipe #4

This is another very simple drink from Cilantro Live. It's a spicy lemonade sweetened with agave which so happens to make it totally vegan! This is also the drink used for the Master Cleanse which is a fast where you drink a spicy lemonade concoction, instead of agave you use grade B maple syrup, for a minimum of seven days and it is very effective in cleansing your deep tissues of toxins caused by the unnecessary elements we expose ourselves to. Christine and I have personally done the fast ourselves on a few occasions in the last 10 years. This lemonade drink is a great refreshing summer beverage, especially if you enjoy spicy flavors!


Ingredients:

fresh lemons
agave
cayenne pepper
filtered water

For a single serving:

2 Tbs. lemon juice
2 Tbs. Agave
1/10 tsp. cayenne
10 oz water

For a pitcher like the one above:

1/2 cup lemon juice
1/2 cup agave
1/2 tsp cayenne (although I prefer mine a lot spicier so I used a whole tsp.)
60 oz. water

I throw in the squeezed lemons and chill. This pitcher will stay good in the fridge for about a week, but it will most likely be gone in a day!


ENJOY!


*Subscribe to this blog for more great health related 
discussions, and yummy recipes that will go straight to your inbox!

Tuesday, June 10, 2014

There are BPA's in your canned tomatoes, and I'm worried.

This is one of the most important food items that I use, and have chosen to question. I find it important since in my house growing up and at my grandparents' house, even my OWN canned tomato products were, and are, a huge staple. As a whole I can say my family is a health conscious bunch. I think I can also say that if we knew how detrimental this product can be to our health then we would have made the appropriate changes a long time ago.


(image borrowed from here)

Even the most conscious people at times make excuses for food awareness. We have all heard the conspiracy theories about the FDA, the commercial farming companies and food distributors. I think that scares people away from believing products are bad for your health even when it's logical. Conspiracy theories are at the root of a lot of indecision on health matters. People don't know who to believe.

The internet is flooded with false information and opinion passed off as fact. I rant about this constantly, and feel it necessary that I repeat it again for anyone tuning in for the first time. I try my hardest to read multiple articles on my current thought, research extensively, and also entertain the opposing theory for reference. I always suggest you do the same whenever I share my findings, you never know I may be wrong....IF I am then please come back and share what you have found so we can learn together!


"1. The Endocrinologist Won’t Eat: Canned Tomatoes
Fredrick Vom Saal, is an endocrinologist at the University of Missouri who studies bisphenol-A. (BPA)

The problem: The resin linings of tin cans contain bisphenol-A(BPA), a synthetic estrogen that has been linked to ailments ranging from reproductive problems to heart disease, diabetes, and obesity. Unfortunately, acidity (a prominent characteristic of tomatoes) causes BPA to leach into your food. Studies show that the BPA in most people’s body exceeds the amount that suppresses sperm production or causes chromosomal damage to the eggs of animals. “You can get 50 mcg of BPA per liter out of a tomato can, and that’s a level that is going to impact people, particularly the young,” says vom Saal. “I won’t go near canned tomatoes.”

The solution: Choose tomatoes in glass bottles (which do not need resin linings), such as the brands Bionaturae and Coluccio. You can also get several types in Tetra Pak boxes, like Trader Joe’s and Pomi. Exposure to BPA Causes Permanent Damage In OffSpring"

 
(images borrowed here for Pomi and here for glass jars)
(source from, "8 Foods Even The Experts Won’t Eat.")

Again this product in particular is something I use constantly, whole, chopped, stewed, paste, puree...For sauces, soups, stews, chili, side dishes, and at that rate I am exposing myself and my family to the harmful chemicals that the acids in tomatoes are drawing out of the aluminum cans they are packed into. Some people say in moderation everything is ok, but I am not taking that chance anymore. Why continue buying products that pose health concerns when you can purchase harmless versions of the same thing?

Here is an article from "USA TODAY" called FDA rejects call to ban BPA from food packaging. This is a great example of how the FDA dismisses proven claims against the harmful substance because it is used in so many products like bottled water and canned foods. It is strange though isn't it that children's bottles, toys, sippy-cups and any product they could potentially put in their mouth is almost always BPA free? Read that article it will inform you of the inconsistencies.

This article is directly found on the FDA website, here they kind of admit there might be a problem, but not to worry they are going to spend another hand full of millions to prove what they already know.

"Studies employing standardized toxicity tests have thus far supported the safety of current low levels of human exposure to BPA. However, on the basis of results from recent studies using novel approaches to test for subtle effects, both the National Toxicology Program at the National Institutes of Health and FDA have some concern about the potential effects of BPA on the brain, behavior, and prostate gland in fetuses, infants, and young children. In cooperation with the National Toxicology Program, FDA’s National Center for Toxicological Research is carrying out in-depth studies to answer key questions and clarify uncertainties about the risks of BPA."

(source is from the FDA website

"Bisphenol A (BPA): Use in Food Contact Application")


Again make your own choices that you determine by your own research, but always inform yourself on the issues related to your health and the health of your family, if you don't who will?

Thank you  to everyone who finds my content useful, I love that I have a place that I can share what is most important to me. 


*Subscribe to this blog for more great health related 
discussions, and yummy recipes that will go straight to your inbox!


Tuesday, June 3, 2014

I have a theory...DRINK water, EAT fruit. What I really found out about those "natural" juice labels...

  The FDA requires that juices sold commercially be pasteurized. Pasteurization means heating the product 160-180 degrees for a short period of time to kill any bacteria that may have made it into the production process. Which is a good thing since there have been many food borne micro-bacteria infestations in fruits and vegetables. The problem with heating an enzyme like the ones that fruits and vegetables are made of is it kills most of the health benefits. In the end that bottle of juice you just bought, thinking it's adding to your health, is essentially sugar water.


We have all been convinced to think that a glass of orange juice in the morning is a part of a well rounded breakfast. Studies in health and diabetic articles have shown that commercial orange juice, even when it states "does not come from concentrate," is one of the worst things you can consume especially when trying to lose weight. You are essentially drinking orange sugar water, and labels will tell you what a great source of vitamins, fiber, calcium, antioxidants...blah blah blah, and I fell for all the same things. Pasteurizing removes most if not all of those benefits we all thought store bought juice contained, even the really really expensive ones. Pasteurization=not real juice.

Home juicing has become huge in the health department. There is one little problem with a "JUICER," and that's when you toss that lovely apple in it's stripped of it's most beneficial components that are found riiiiiight beneath the skin. Now the real smarty pants know that a high powered blender like the VitaMix or Ninja are the way to go, unless it's an orange then squeeze it fresh yourself! You toss everything in and blend it up, similar to a smoothie, and it's the real juice your body is actually looking for!


I have a theory... drink water, eat fruit. Fruit, naturally, has a lot of sugar there's no need to add any:) When trying to lose weight, especially for women it's a huge help to cut out anything with processed sugar. Next time you are in that juice isle look at how much sugar is actually in that bottle, see how almost all juices are from concentrate, and then when you find an "all-natural juice" see where it says pasteurized. If you don't believe me then do what I always suggest and research it, you will be just as sad as I was to find out that 18 oz. of "real" Blueberry juice can cost $8.99, and still be almost nothing more than Kool-aid.

P.S. don't be afraid to add vegetables to those juice-blends!


(ALL IMAGES BORROWED)


*Subscribe to this blog for more great health related 
discussions, and yummy recipes that will go straight to your inbox!


Thursday, May 29, 2014

Fresh home-made Almond Milk (3 steps)

Almond milk is so easy and good for you. If you live the milk-free lifestyle, but still love a cold creamy glass to go with your sweets, in your smoothies or even in your coffee then almonds milk is awesome. Although be aware that almond milk shouldn't be a substitute in regards to the calcium or protein you get from a source like cow's milk. When comparing the two researchers find that almond milk has 1 gram of protein vs. cow's milk having 8 grams. Milk made from almonds is very low in calories at 60 per cup, there is no cholesterol or saturated fats it's low sodium and has lots of Omega-3 fatty acids. There isn't as much calcium as they state milk has but it does have 30% of your daily requirement. Great news for your skin in terms of Vitamin E too:) almond milk has 50% of your daily intake. While I don't truly know if this is the best idea since we ALWAYS kept it refrigerated I read an article that states it can be left at room temperature safely. Always do your own research and always have fun in the kitchen!


Here is an easy three step process to have fresh almond milk in your kitchen in less than 10 minutes!

You will need:

Blender
Cheese cloth
Container with a lid

Prep time: 24 hrs (although I forgot to soak the almonds it still works but they release more protein and are easier to blend.)

"Cook" time: 5 minutes

Servings: approx. 9 cups

Ingredients:

2 cups of raw almonds
7 cups of water (we fill the blender to the 9th cup mark)


Directions:

1. Soak almonds overnight

2. Blend on high for 1-2 minutes

3. Strain in cheese cloth (pulp included) and store in the fridge!


 To this mixture you can add a couple Tbs. of honey or agave to make it sweet. I prefer it plain, but The Hunebee likes hers with a hint of sweetness<3 We stored ours in large mason jars that have a screw on lid and put them in the fridge. This "milk" should keep for 2-3 days.


 ENJOY!


*Subscribe to this blog for more great health related 
discussions, and yummy recipes that will go straight to your inbox!

Thursday, May 22, 2014

RAW-recipe #3 part B "Mint Carob smoothie"

This peppermint oil, carob powder, almond milk and banana smoothie is another drink on our list of favorites. Next week we're going to do a step by step for fresh almond milk so stay tuned. Below is a sweet tasty treat that is low in calories, high in potassium, and low in fat. 

You can purchase carob powder at a health food store like Sprouts and if you want to cut down on time and price you can buy already made Almond milk, but it needs to be sweetened. Lastly make sure your bananas are completely frozen. 


Prep time: 5 minutes
Servings: 1

Ingredients:

8 oz. almond milk
1/4 tsp. peppermint oil
2 frozen bananas
2 Tbs. carob powder


 Directions:

Fill the blender to the 8 oz. mark, add carob, frozen banana and mint. Blend until smooth and creamy.
Pour into a glass and garnish with fresh mint leaf, drink immediately. The consistency will be smooth but not thick, you can add more frozen banana if you prefer it to be thicker.


ENJOY!

*Subscribe to this blog for more great health related 
discussions, and yummy recipes that will go straight to your inbox!


Wednesday, May 21, 2014

RAW-recipe #3 part A "Raw Margarita"

The Raw Margarita is one of the two drinks featured in tonight's RAW-recipe contribution and is made from the fresh juice of green apples, lemon and ginger with a sprinkle of cinnamon. For this recipe you will need a juicer, again one of those kitchen appliances that are mandatory. 


 We used the Jack Lalanne Power Juicer, anyone will work fine, but you do want a juicer that will separate the apple and ginger skin from the juice. That is why a blender won't work here. You don't want chucks of skin in your drink!

Prep. time: 15 minutes
Servings: 2


 Ingredients:

4 cups green apples
2 Tbs. lemon juice
2 tsp. ginger root juice
sprinkle of cinnamon


Directions:

Juice 4 cups of green apple, I large ginger root, and                                      
hand squeeze 1 large lemon. This recipe makes two 16 oz.               
drinks. In a glass combine 16 oz. or two cups
of fresh apple juice, 2 Tbs. of lemon juice and 2 tsp.
of fresh ginger juice. Sprinkle the cinnamon on top, 
stir with a spoon to mix the lemon and ginger before 
drinking!
 

ENJOY!

*Subscribe to this blog for more great health related 
discussions, and yummy recipes that will go straight to your inbox!

Thursday, May 15, 2014

RAW-berry Shortcake (raw recipe #2)

This weeks RAW-recipe was a raw take on the famous "strawberry shortcake." A recipe that was created for Cilantro Live, the Raw, Vegan restaurant Christine and I worked for, a recipe that Christine is responsible for improving upon. It has been years since either of us has attempted any of these delicious treats. Last night was a whole lot of fun not only to do, but to eat! We even got my meat and potatoes boyfriend, Tyler, to enjoy one as well! From the bottom you'll see an almond "crust," the second layer is a sweet strawberry sauce, the ice cream is a basil flavor made from cashews along with the "whipped" topping. While this dessert is a tad bit of work it's also a whole lot of fun!

You will need to have 3 major appliances for this recipe: 1. a food processor, 2. ice cream machine and 3. a blender. Without those 3 things this will be almost, no, it will be impossible so it's a good idea to make sure you have them. I purchased a great Sunbeam brand, electric, 4 quart ice cream machine the only down side is it does require ice and salt, but was actually pretty quick from start to finish. I received from Tyler, for my birthday/mother's day, a 7 cup Cuisinart food processor that we used for the "crust" and strawberry sauce. The blender is vital for the ice cream and "whipped" topping, and even though the cashews are soaked over night they still need to be blended until they are the consistency of "cream." 


Prep. time: 24 hours
"Cook" time: 1-1 1/2 
Servings: 6

Cost per serving: $3.75


 Ingredients:
(ice cream)

1 1/4 cup cashews (soaked in water, over night in the fridge)
1/4 basil
1/2 agave
Pinch of salt
Water up to 4 cup mark

(whipped topping)
3/4 cup cashews
1 tsp. vanilla
1/8 cup agave
1 tbs. water (Blend until creamy, if it's too thick add 1 Tbs. water)

Directions:
(start the ice cream first)

Soak the cashew in a bowl of water over night in the refrigerator. Drain the water and measure out 1 1/4 cup. Add the cashews, 1/4 cup whole basil leaves, 1/2 cup of agave and a pinch of salt into the blender. Fill the blender up to the "4 cup" mark and blend on "HIGH" for 2-3 minutes or until you have a frothy, light green "cream."

Pour into your ice cream maker and  turn on, and work on other components while the ice cream comes together. The ice cream should take 45 minutes to an hour to finish.


Ingredients:
(strawberry sauce)

1 cup chopped strawberries (save 4-6 fresh whole berries for the garnish)
1 1/2 tsp. lime juice
1/8 cup agave
Pinch of salt

Directions:

In the food processor add 1 cup of fresh strawberries, 1 1/2 tsp. of fresh lime juice, 1/8 cup of agave and a pinch of salt. Pulse until the berries are smooth and set aside in a smaller bowl for your next step; the "crust."


Ingredients:
(crust)

1 cups peeled almonds
1 tsp lime zest
1 1/2 tsp. lime juice
1 1/2  tsp. water
Pinch of salt


 Directions:

Slightly boil water and pour over raw almonds, let it sit for 20-30 minutes, once the water has turned a brown color and the skins feel "loosened" you can pop the almond out of it's casing. Discard the casings and drain the water. Measure out 1 cup of peeled almonds add to the processor with 1 tsp. lime zest, 1 1/2 tsp. lime juice, 1 1/2 tsp. water and a pinch of salt.
(directions cont.)

The consistency of the almond "crust" should be a loose paste and you should be able to pack it into your hand, but it shouldn't be overly moist.
To assemble your dessert start by packing 2 Tbs. of the almond "crust" into a shallow container, or small parfait cup(that is what we used at the restaurant).
On top of the "crust" add 2 Tbs. of strawberry sauce and remember to save some fresh strawberries for garnishing. We sliced them and added 4-5 fresh pieces to each dessert cup.
To finish add two scoops of the basil ice cream, 
 dollop of the whipped topping, a sprig of basil leaf
 and fresh strawberry slices!

ENJOY!
  

*Subscribe to this blog for more great health related discussions, and yummy recipes that will go straight to your inbox!